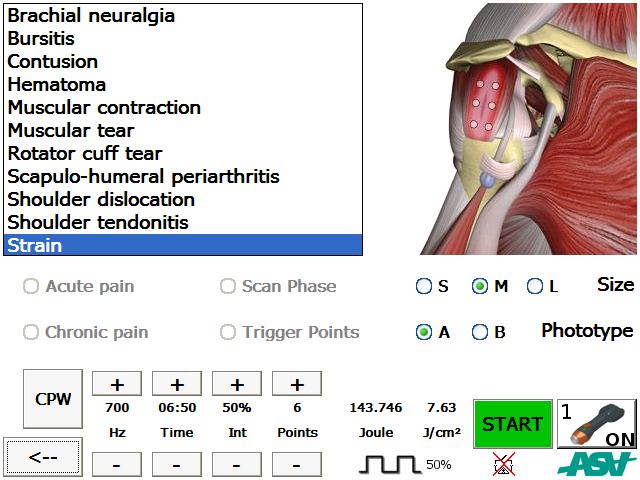
Pathology mode M6
Robotic head Select channel 2 Select the body part – e.g. shoulder (for this lesson) After selecting the body part A screen appears showing details…
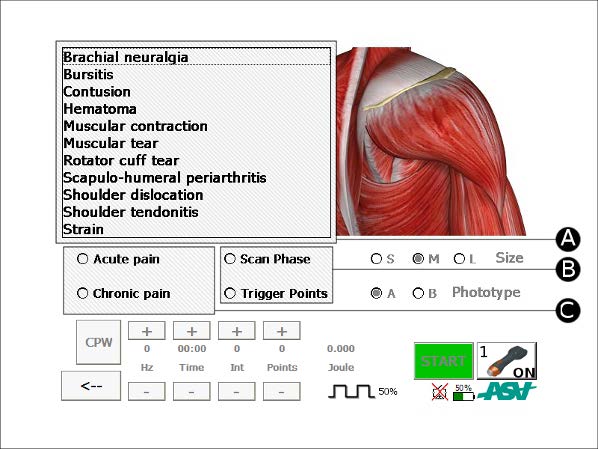
Robotic head Select channel 2 Select the body part – e.g. shoulder (for this lesson) After selecting the body part A screen appears showing details…
Management software ► This section provides a short overview. Details are contained in later lessons. The management software for the device is structured to allow…
Password screen With password enabled, the user will be asked at start-up to input a password. Enter the password that you were provided by email,…
Assume laser radiation can potentially reach all areas of the treatment room and therefore glasses are mandatory for all in the room. Eyewear can include sleep…
OPTIONAL The features in this topic will not be needed or only infrequently. Press the SETUP button (B) on the home screen A – Date…
Controls and warning devices The START/STOP button (A); The red emergency button (B); Laser warning lamp (C); Operator display (D); The connector of the handpiece…
Controls and warning devices The START/STOP button (A) The red emergency button (B) Laser warning lamp (C) Operator display (D) The connector of the handpiece…
Safety The Australian Standard for Laser Safety (AS NZS 2211.1-2004) includes the following room requirements for safe laser use: Warning signs on entrances Avoid reflecting…
Don’t drop the handpiece or leave it where it could be knocked. Use the handpiece holder on the side of the unit. Read the cleaning…
Locate the following components Power cable – USE THE AUSTRALIAN PLUG SUPPLIED SEPARATELY (NOT THE EU CABLE IN THE CRATE) Surge protector – with or…